(match casing of Finnish name to in game casing) |
No edit summary |
||
| Line 10: | Line 10: | ||
| blood fluid = [[Blood]] |
| blood fluid = [[Blood]] |
||
| drops on death = {{Gold|600}}, [[Sauvan Ydin]], A Cunning Contraption, 4 spells from a pool (see '''Rewards''') |
| drops on death = {{Gold|600}}, [[Sauvan Ydin]], A Cunning Contraption, 4 spells from a pool (see '''Rewards''') |
||
| + | | immunities = freeze, electricity |
||
| spawn location = [[Throne Room]] |
| spawn location = [[Throne Room]] |
||
| traits = Enters 3 phases throughout the fight, has 8 orbs that slowly orbit around him, immune to freezing and electricity related stuns. |
| traits = Enters 3 phases throughout the fight, has 8 orbs that slowly orbit around him, immune to freezing and electricity related stuns. |
||
Revision as of 15:20, 13 February 2021
This page or section includes possible gameplay spoilers or secrets. Tread carefully.
The Master of Masters or Grand Master (in-game name Mestarien mestari) is a boss encountered in the Throne Room, east of the Wizards' Den. Although quite slow, moving in a manner similar to the Ylialkemisti, he uses an array of dangerous attacks, which can quickly overwhelm and debuff the player to the point of death.
Behavior
The Grand Master will remain stationary in the center of the arena until he spots the player. At this point the fight begins, and the boss will slowly move towards the player, stopping from time to time in order to preform attacks.
He has 8 Orbs, 4 Death Orbs, 4 Blood Orbs, all of which slowly orbit around him. The Death Orbs make him invincible, so they have to be killed in order to deal damage. Meanwhile the Blood Orbs are not to be killed, but avoided, as the damage they receive will be unavoidably dealt back to you as Blood Link damage. This can be devastating with high damage, one shot spells. Note that this damage is nullified by Ambrosia.
When the player is visible, the boss will periodically raise his hand, and perform one of the Phase 1 or Phase 2 attacks, granted he is in said Phase. In Phase 3 the boss will only use one attack, while continuously chasing the player. Phase 2 begins when the boss reaches 50% health, Phase 3 begins when the boss reaches 25% health.
| Phase | Attack | Description |
|---|---|---|
| Phase 1 & 2 | Random Debuff | A purple, slowly closing in circle will appear around the player. After about 2 seconds, a random negative status effect will be applied. The effects can be, but are not limited to:
|
| Green Meteor | A fast, green meteor, that deals 125 explosion damage. | |
| Summoning Spark | A sparkly, yellow projectile, that doesn't deal damage, but upon expiring will summon a random Mestari enemy. | |
| Magical Burst | An inaccurate burst of multiple blinding, polymorphing, teleporting and neutralizing magical projectiles. | |
| Phasing Sphere | A blue sphere, that travels in a phasing manner. After some time of flight, it will fire 3 copies of itself, which behave similarly. This process can quickly get overwhelming, but stops after enough copies have been created. | |
| Phase 2 | Blood Tentacle | A long, red tentacle that deals 25 melee damage on contact. |
| Phase 3 | Tentacle Frenzy | This attack is constantly used for the whole duration of Phase 3. The boss will fire Blood Tentacles in random directions, and gains a speed boost. In addition to that, any nearby enemies will start using Blood Tentacles, until the Grand Master is killed. |
Rewards
| Spells | |||
|---|---|---|---|
| Random Spell | Random Projectile Spell | Random Modifier Spell | Random Static Projectile Spell |
| Spell Duplication | Copy Random Spell | Copy Random Spell Thrice | Copy Three Random Spells |
In addition to the extremely useful Sauvan Ydin, the Wizard also drops a book titled "A Cunning Contraption". Its contents are a hint to the Crystal Key secrets.
 |
Combat Tips
- Don't be greedy with your shots, especially when using high damage wands. One missed shot into a Blood Orb, can take down a huge chunk of your health, or even kill you.
- It may be wiser to use lower damage rapid fire wands, as the boss does not have invincibility frames or a shield. This also reduces the risk of losing large amounts of health due to Blood Orbs.
- Make sure to clear the nearby area of any enemies. Kill the Wizards just as they are summoned, if ignored, they can quickly increase in numbers and become overwhelming.
- Always check what debuff the Wizard gave you. With wands that can hurt you, do not shoot when under the Boomerang Spells debuff.
- You can exploit the Boomerang Spells debuff to heal with a Healing Bolt.
- You can try to hide, but be wary. The Wizard can't dig by itself, but his green meteor attack can. This can be used to quickly destroy his Death Orbs.
- Melee Immunity can make Phase 3 trivial.
Gallery

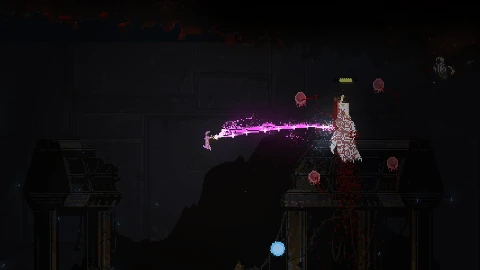
Being chased in Phase 3 with Melee Immunity